Scan Policy Optimizer
Invicti has a built-in wizard based Scan Policy Optimizer that you can use to help you create a Scan Policy for your target website. Even though configuring a Scan Policy results in more efficient, speedy web security scans, many of us do not have the time to trawl through each individual check and determine which ones to enable or disable.
- Considering the extensive functionality in Invicti, what you manually configure in the Scan Policy can have an impact on the duration of the Scan. One of the ways to reduce this is to optimize the Scan Policy to avoid running irrelevant security tests during the Scan.
- Should you later wish to manually optimize your Scan Policies, you can still do so.
For further information, see Overview of Scan Policies.
Scan Policy Optimization Wizard Steps
The table lists and explains the steps in the wizard. The wizard is available in both Invicti Enterprise and Invicti Standard.
|
Step |
Description |
|
General Information (Create Optimized Scan Policy in Invicti Standard) |
This step introduces the wizard. |
|
Operating System |
This is the Operating System on which the target web application is running. |
|
Web Server |
This is the Web Server software on which the target web application is running. If the Web Server on which your web application is running is not listed:
|
|
Application Server |
This is the Application Server (web technology) on which the target web application is built. If it is built using multiple Application Servers, select all that apply. If the web technology on which your web application is built is not listed:
|
|
Invicti Hawk Connectivity (Invicti Standard only) |
While scanning with a policy that includes SSRF-based security checks, Invicti may contact a server to detect the existence of some vulnerabilities. Invicti accompanies Invicti Hawk to detect these kinds of issues. In the relevant wizard step, you can configure Invicti Hawk the settings or leave as it is. |
|
Database Server |
This is the Database Server the web application is using. If multiple Database Servers are used, select all that apply. If the web application is using a Database Server that is not listed:
|
|
Web Application Behavior |
This discovers dynamic links in a web application by simulating various DOM events, depending on the selected description. The options are:
You can configure its settings in the JavaScript tab of the New Scan Policy window. |
|
Resource Finder |
This attempts to find unlinked or hidden directories and other resources, such as old backup files, using a brute force method. You can use the Limit input field to limit the number of resources Invicti tries to find. The default limit is 125. |
|
Summary |
This displays the selected configurations. |
How to Create an Optimized Scan Policy in Invicti Enterprise
- From the main menu, either:
- Click Policies, then Scan Policies. For the relevant policy, click Optimize.
- Click Policies to create a new optimized policy, then New Optimized Scan Policy.
- The Scan Policy Optimization Wizard is displayed at the General Information step.
- Click Next. The Operating System step is displayed.

- From the list of options, select the operating system(s).
- Click Next. The Web Server step is displayed.

- From the list of options, select the web server software.
- Click Next. The Application Server step is displayed.

- From the list of options, select the application server.
- Click Next. The Database Server step is displayed.

- From the list of options, select the database server.
- Click Next. The Web Application Behavior step is displayed.
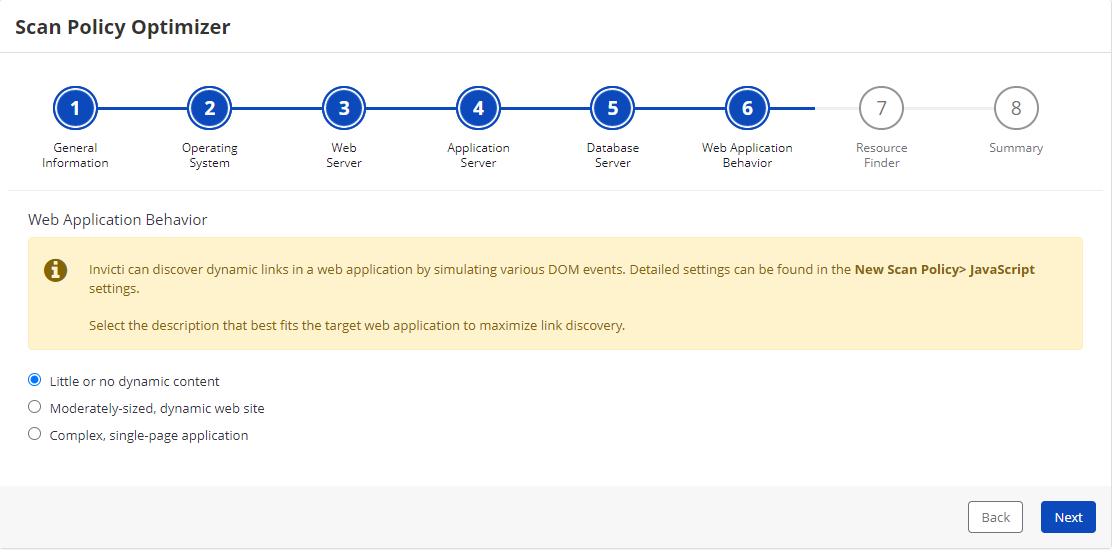
- From the list of options, select a description.
- Click Next. The Resource Finder step is displayed.

- In this step, enable and limit (or disable) the Resource Finder.
- Click Next. The Summary step is displayed.
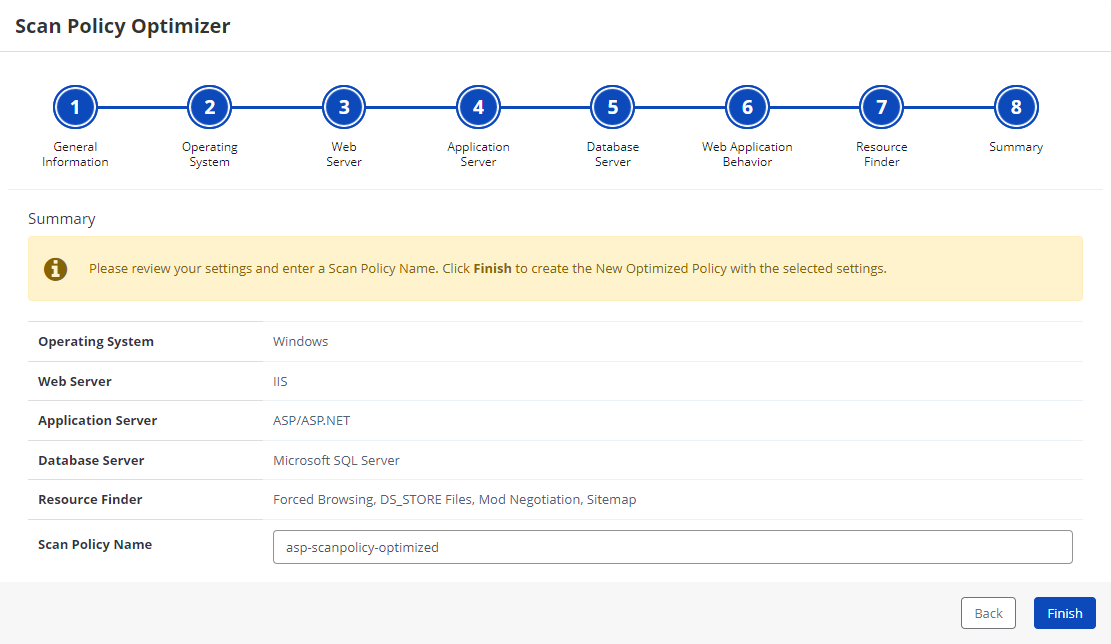
- In this final step, review your configurations. If you need to amend anything, use the Back button to navigate back to that option.
- Click Next to return to the Summary.
- In the Scan Policy Name field, enter a name for the scan policy.
- Click Finish. This scan policy can then be used during an upcoming scan.
How to Create an Optimized Scan Policy in Invicti Standard
- On the Home tab, click New. The Start a New Scan dialog is displayed.
- In the Scan Policy section, click the magic wand button (
 ) next to the Default Security Checks dropdown. (You can also launch the Scan Policy Optimizer from the Scan Policy Editor. Click New Optimized.) The Scan Policy Optimizer wizard is displayed.

- Complete the steps as described in How to Create an Optimized Scan Policy in Invicti Enterprise.